|
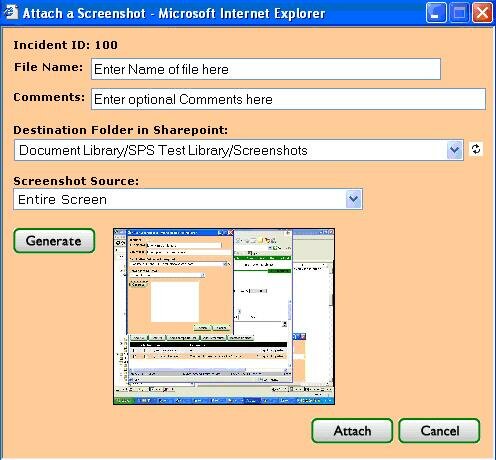
With the release of version 3.6, Visual Intercept Web and Web Relay have added the ability to capture screenshots from the Document tabs of the Incident, Project, and Contact documents. This feature enables a user to take a screenshot of an error message or other screen information, enter informative comments about the screenshot, relate it to a Visual Intercept document, and update it to their SharePoint documents folder or document directory without having to leave the Visual Intercept interface.
To add a Screenshot to an Incident:
- Open the Incident document and select the Documents tab
- Click Add Screenshot

- Enter a file name for the Screenshot (Note: Screenshots are automatically saved in .JPG format)
- Enter Comments if desired
- Select a Screenshot Source from the drop-down menu
- Click the Generate button
- If using SharePoint as your document manager, select the folder you wish to place the file in from the Destination Folder in SharePoint combo-box
- Click the Attach button to continue or the Cancel button to abort the file attachment
- Select Actions |Update from the Navigation menu or click the Update icon
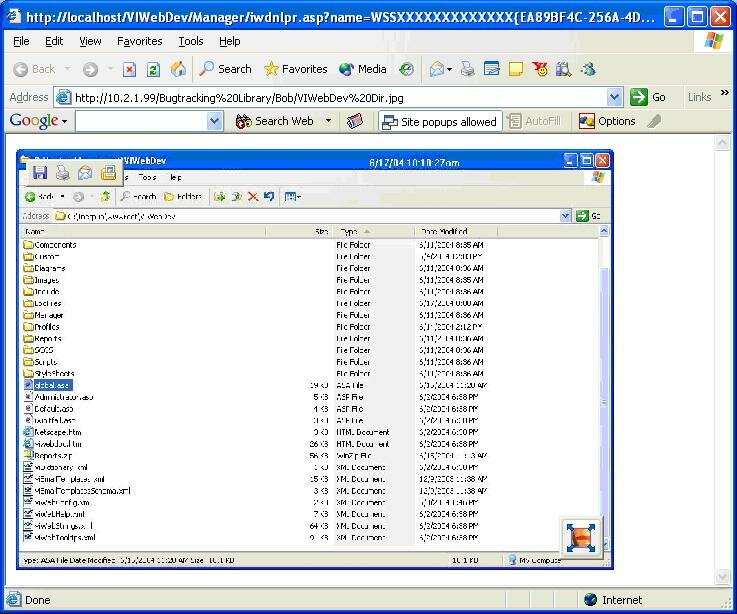
As with any related Visual Intercept document, to launch an attached screenshot select the Documents tab and click on the document link to view the image.
In some cases, due to the size of the new browser window, the image may be difficult to view. Should this be the case, you can either maximize the browser window or use the Windows image control to restore the image to its original size. To use the Windows control, simply hold the mouse over the lower right corner of the image until the control appears and then click on the control box as seen below. 
If you have other questions about issues not included in or beyond the scope of this Tech Tip, please contact Elsinore Technical Support Services at or 866.866.0034, option 2.
|
